When it comes to video, any professional will tell you that audio quality matters more than video quality. While there are plenty of great USB mics to use at a home studio, things get a little more tricky when you are on the go. Comica is aiming to make recording high-quality audio on the go easier with their VDLive10 kit. Featuring a lightning or USB-C equipped receiver and two transmitters with built-in mics all in an easy-to-use carrying case, the Comica VDLive10 kit seems to have everything needed to get good audio for a mobile live video, recording on location, or even video conferencing. Be sure to hit the video below to see all of the details.
Comica is carrying two versions of the VDLive10 kit. One uses a lightning connector for iOS devices while the other packs USB-C for a huge range of uses. With two transmitters ready to connect to an iPhone or any other device, the Comica VDLive10 kit can be used in a variety of scenarios. For vlogging or streaming from a mobile device, it allows two people to easily have great audio for captive conversations.
In other situations, the kit also works as a wireless LAV setup with something like a mirrorless camera. This is how I’ve used the Comica kit the most while recording some quick interview videos.
Out of the box
Getting the kit out of the box, Comica has included a hard case holding the two transmitters and receiver, a cold shoe mount, a coiled 3.5mm TRRS to TRRS cable, a USB-C to USB-A charging cable, two windscreens for the transmitters, a manual, and a soft carrying pouch that can fit all of the contents.

Design: transmitters
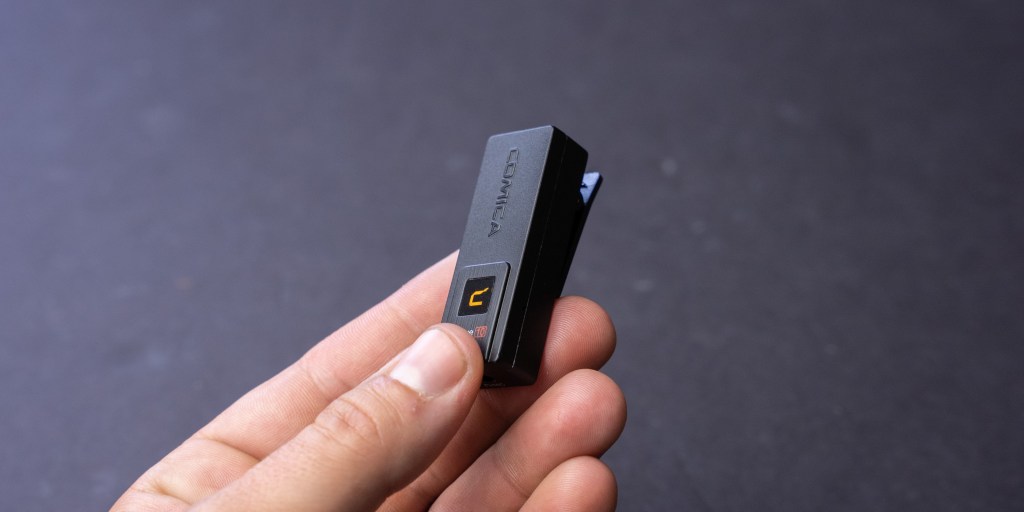
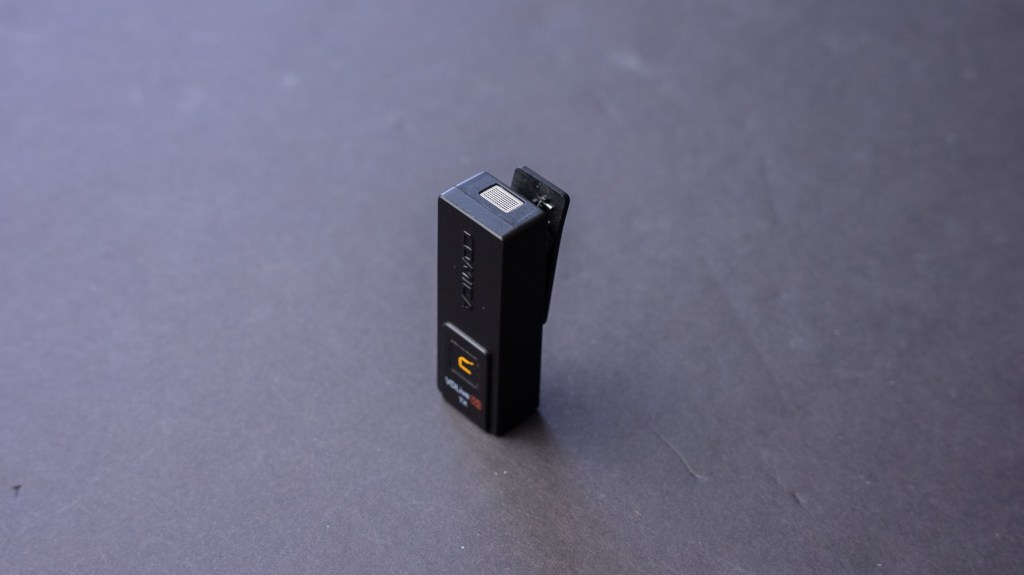
Comica’s devices are utilitarian in design, but that fits their purpose pretty well. The transmitters feature a simple illuminated logo on the front that turns on when powered on and turns red when muted. On the left side are all of the controls. The three-way switch on top will toggle between off, simplex mode, and duplex mode. We’ll get into those modes a little later. Below the power switch, there is a single button that can cycle between four different volume levels with a single press and mute the transmitter when held for a couple of seconds. On the right side is a small reset button.
On top of the transmitter is the microphone. It’s combined with the clip on the back of the unit and it’s easy to place the microphone on a garment of clothing for picking up a voice.
On the bottom of the transmitter is a multi-purpose 3.5mm port. In simplex mode, the 3.5mm port works like a microphone, and in duplex mode, it will function as a monitor out to hear your own audio.
Comica VDLive10: video
Design: receiver
Both versions of the Comica VDLive10 receiver have their connection on the left side. Comica also includes a little cap to place on the connector to try and protect it.
On the front of the receiver is a screen with plenty of useful information. Up top, the screen shows manual or stereo mode and the battery level or the receiver. Underneath are statuses for both of the transmitters. Signal level, battery level for each transmitter, the current volume level, and an audio level meter are all easy to monitor from the screen.
On the right side of the receiver are a power switch and a manual/stereo toggle button.
Comica also has a 3.5mm port on the bottom of the receiver to send the audio out to another device like a camera or external recorder. For me, this works great with my Sony camera as a wireless LAV setup. The receiver will output audio to both the 3.5mm port and the digital lightning port at the same time if necessary.

Getting the Comica VDLive10 set up
Getting the Comica VDLive10 set up is very simple. Just pull them out of the case and turn on the receiver and one or both transmitters. Then, plug the receiver into a compatible device or use the 3.5mm cable for an analog connection.
Clip the transmitter onto your subject or use an external microphone and you’re all set up! If your subject is quiet you can adjust the volume level on the transmitter, but I’ve found that leaving it at volume level 2 works well for me.
Comica VDLive10: controls
The transmitters have four different volume modes depending on the input level. Swapping between them is as easy as pushing the button on the side of the transmitter. The receiver will display the current set volume, and you can monitor the level on the receiver as well to make sure it’s not too loud or too quiet. The screen updates are kind of slow so it’s not as easy to monitor as more dedicated devices, but it at least gives you a visual idea of your audio level.
Recording in the mono setting will combine the audio from both transmitters into a single mono file while stereo will separate them and allow editing them both individually in post. So for a live stream, you may want it set to mono for a natural sound, and stereo might be better for a recorded interview where you want to edit them separately at a later time.
Comica VDLive10: How does it sound?
Overall, it sounds pretty decent. I’ve used the VDLive10 with an external mic more than just the transmitter itself, but in both situations, I ended up putting some light EQ on the audio. I found it a little muddy so I would take down some lows and boost the highs a bit. But I would argue that most LAV mics need a little EQ tweak.
It’s absolutely good enough for a stream, but when editing my videos, I usually tweaked the audio some.
In all situations, though, it’s a great way to get better audio from a subject talking than a mic on a mobile device or even a mic on a camera. In a noisy or echoey room, talking to a camera from far away gives terrible audio. Having a microphone directly clipped onto the subject sounds much better.
Can you hear you now?
One unique feature of the VDLive10 kit is the ability to monitor audio through the transmitter in duplex mode. In this mode, you can plug headphones into the 3.5mm port to monitor the audio coming through the receiver. You won’t be able to use an external microphone at the same time, but you’ll be able to make sure your mic sounds good.
Battery life
Recharging all of the units is as easy as putting them back into the case. The only issue here is if you are planning a long shoot. The receivers and transmitter will last for around four hours, but then must be charged in the case rather than quickly swapping batteries. A full recharge will take about two hours, and the case can recharge the kit three times before it needs to be topped off itself.
9to5Toys’ Take
At $180 for the USB kit and $200 for the lightning version, the Comica VDLive10 is a great way to get easy wireless audio to a phone or other device. It’s incredibly easy to use, thanks to the wireless connection and the clip-on design. I really appreciate the versatility of multiple recording scenarios. I do end up tweaking the EQ some, but most lav mics usually require a bit of adjustment.
Buy Comica VDLive 10
FTC: We use income earning auto affiliate links. More.

Comments