With Meta selling over 10 million of their entry-level Quest 2 headsets, the market for accessories is growing. One handy way to store and charge your new all-in-one VR headset and controllers is a dedicated dock. We took a look at the Anker charging dock last year, but now we’ve got our hands on the flashy new NexiGo Quest 2 charging dock. Be sure to hit the video below to see all of the details.
Say what you want about Facebook/Meta, but there is a reason that the Quest 2 is such a popular VR platform. At just $300 for an all-in-one stand-alone headset, it’s arguably the best way to get into VR.
Standard Quest 2 battery life
One of the only downfalls of the Quest 2 may be its short battery life. While tethered models like the pricey Vive Pro 2 are powered by a PC, the standalone Quest 2’s battery will typically get two to three hours before it needs to rest (and maybe you do too). Recharging the headset from the standard charging adapter will also take two to 2.5 hours.
The controllers, on the other hand, have pretty ridiculous battery life. Meta/Oculus claims 60 hours, which means users are also reporting multiple days of use with battery levels still above 90%. Recharging them every time the headset needs more juice is unnecessary, but it’s still a handy place to store them with the headset, and you might as well keep them topped off.
NexiGo
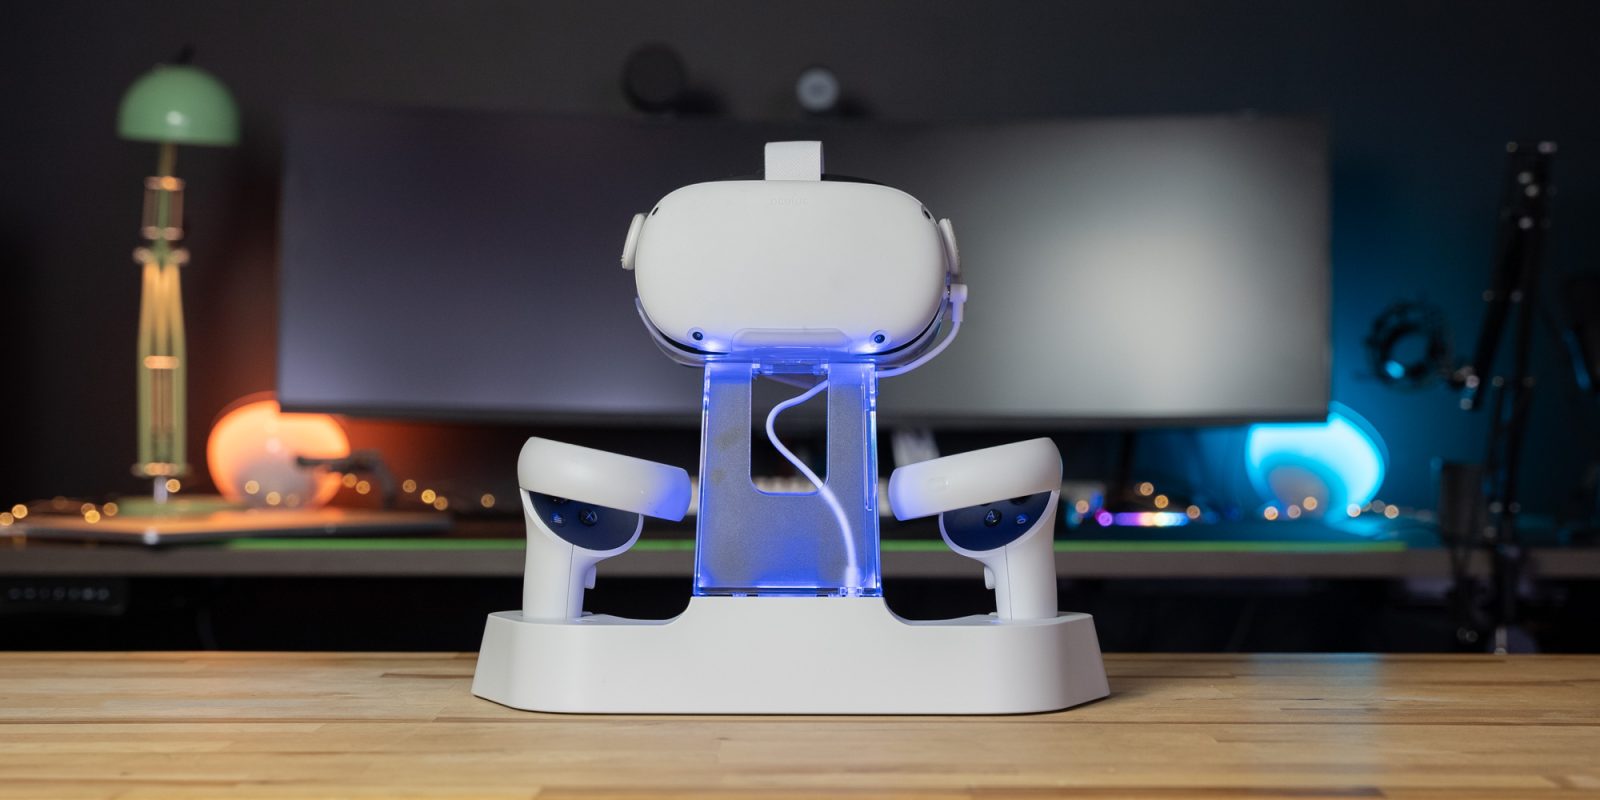
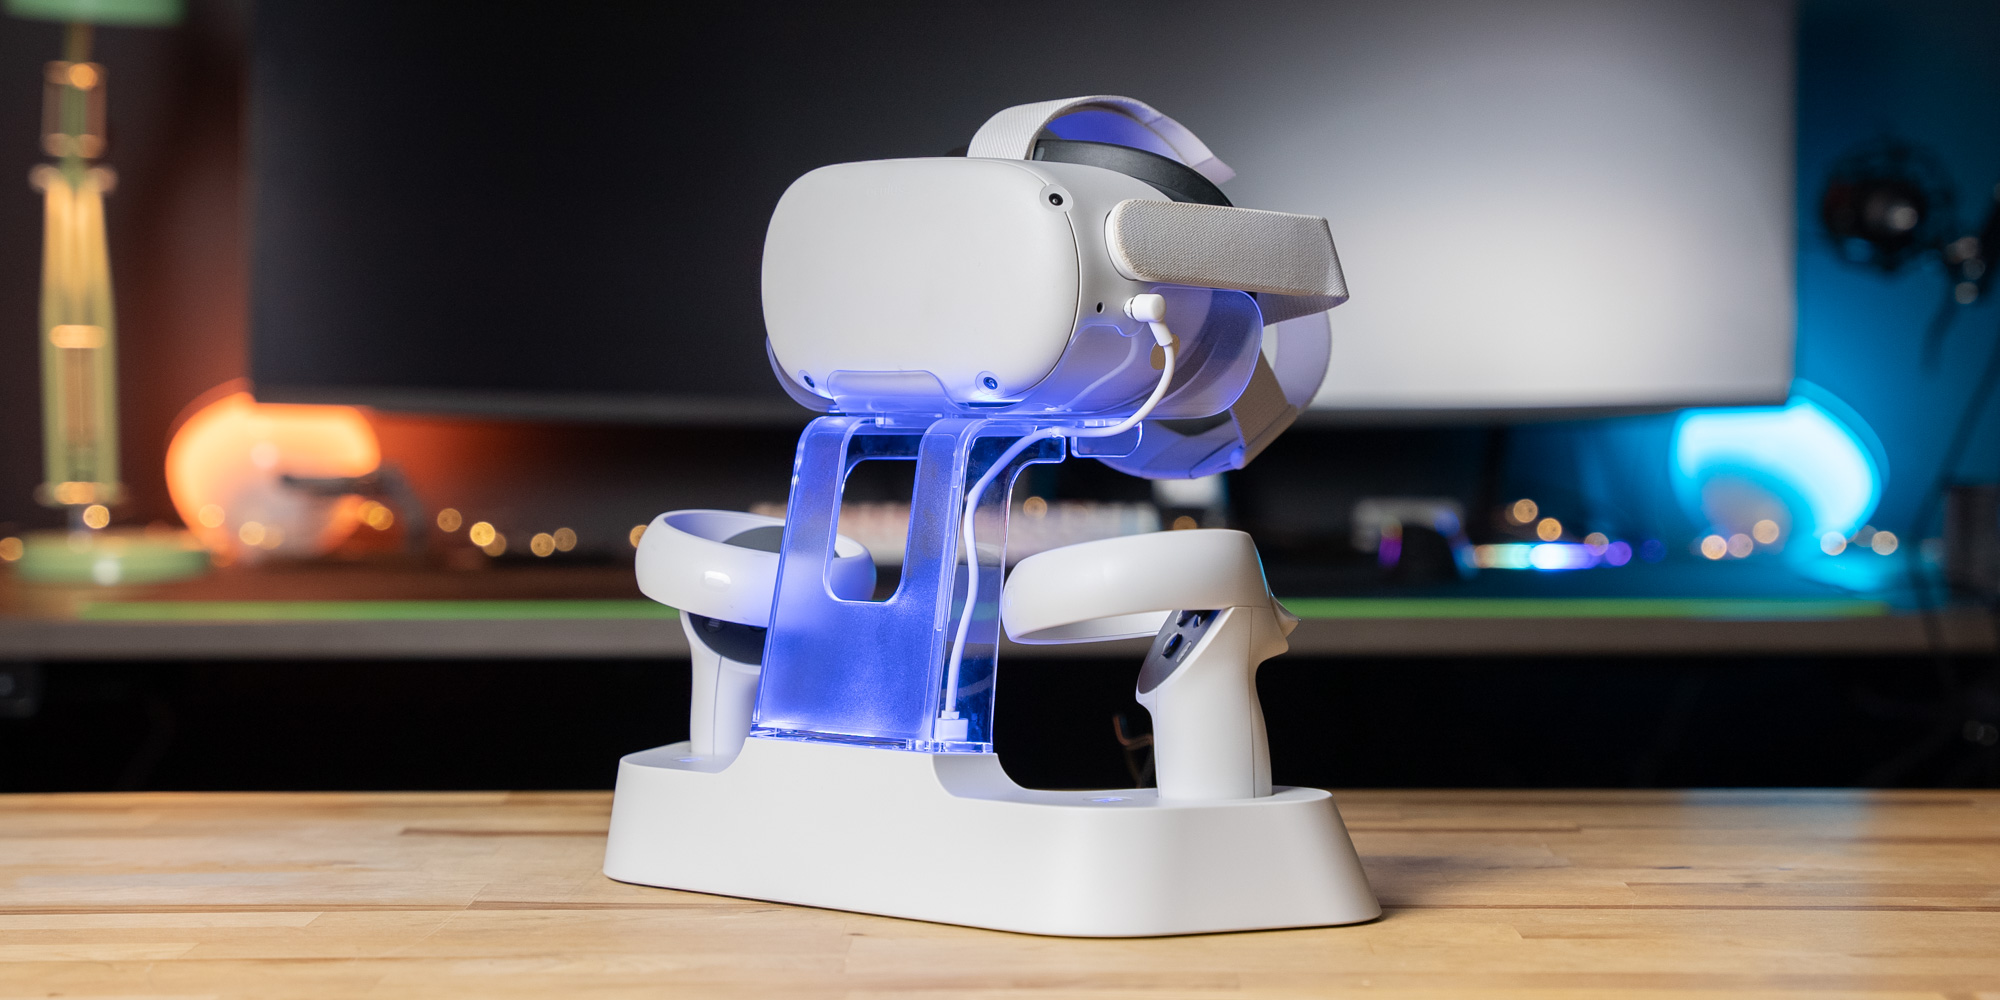
Coming in at $80, the NexiGo Quest 2 charging dock is a little more flashy than the $100 Anker, but it’s also a little more affordable. Because of the elevated stand for the headset, the NexiGo sits considerably taller than the Anker. Depending on where you are planning on placing the stand, this might be good or bad. The transparent riser support stand for the headset also glows to signify the current charging status of the headset.

NexiGo Quest 2 charging dock: setup
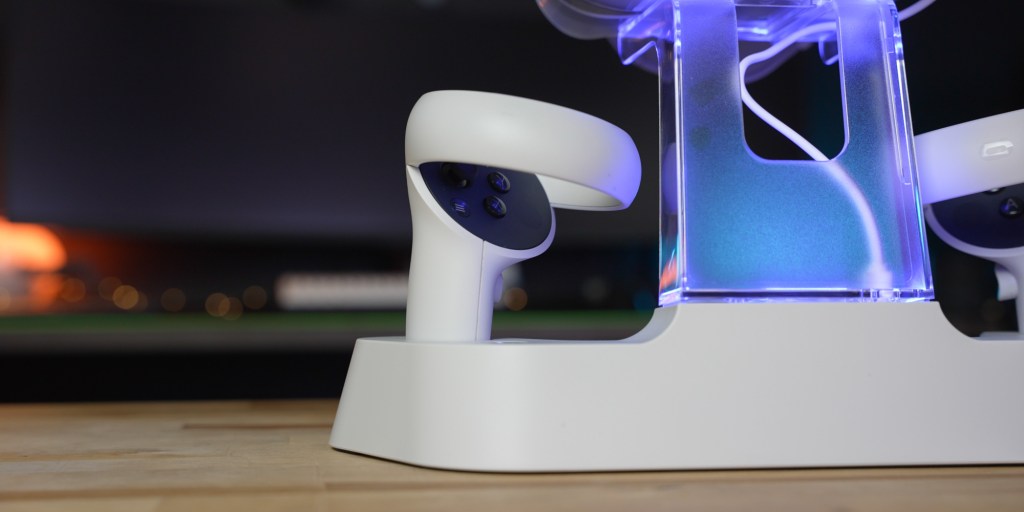
Setting up the NexiGo charging stand is pretty straightforward. First, connect the cradle for the headset into the riser support and install the riser into the base. Next, plug the USB-A cable into the base, remove the small magnetic USB-C connector from the cable, and route the cable up to the cradle. There is a small metal piece on the side of the cradle to hold the magnetic cable when the headset is in use.
Then, install the small magnetic stud into the USB-C charging port of the headset, which will connect to the magnetic charging cable to top off the battery. The one downside of this design is that you have to manually attach the cable to the magnetic stud every time you place the headset back on the stand. With the Anker, which also uses a magnetic stud, because of the way it’s designed, the cable will automatically attach when the headset is set down.
NexiGo Quest 2 charging dock: Video
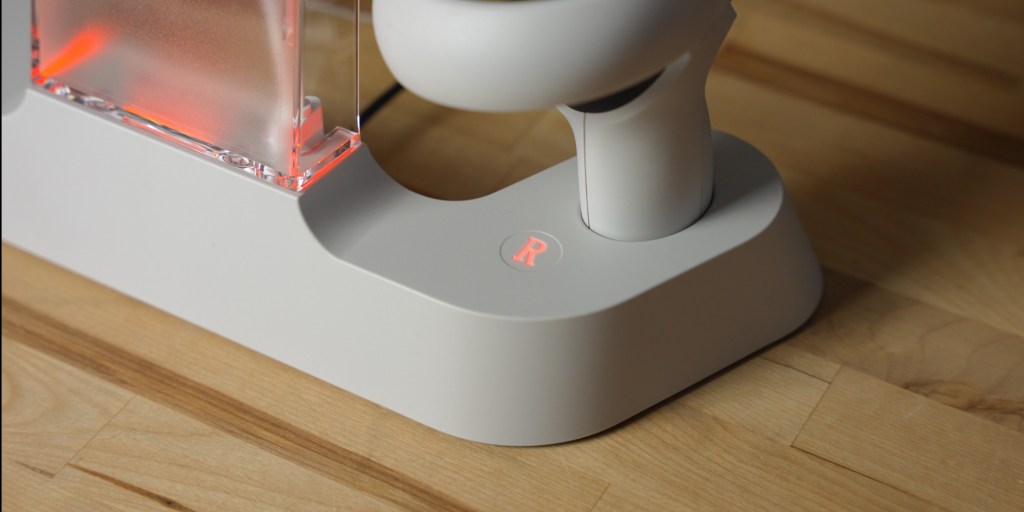
When set up and powered on, the riser will glow orange when the headset is charging and blue when the headset has a full charge.
For the controllers, just remove the stock battery covers and batteries and then install the new batteries and charging covers. Make sure that the metal contacts on the batteries are facing out so that they make contact with the connections on the battery covers.
The controllers fit into charging slots on the left and right of the headset with the new battery covers installed. Next to each controller are L and R letters that illuminate to show the current charge status of the controller. Just like the headset, the lights will glow orange when charging and blue when fully topped off.

Anker’s charging dock
At $99, the Anker charging dock has a sleeker design that is slightly wider than the NexiGo, but can be a little finicky with the controllers. Usually, everything works well, but occasionally the controllers seem to have difficulty getting a good connection. When this happens, the light will flash orange and I need to take the controller out and reseat it in the dock to try to get a better conenction. Usually, this only happens once, but it is a little annoying.
So far, I haven’t noticed any issues like this with the NexiGo. Maybe that’s because the charging contacts are on the bottom of the controllers and they sit nicely inside the charging stand rather than the way that the Anker is designed.
The Anker charging dock is also the only one listed on the official Meta Quest/Oculus store.
Other Quest 2 accessories
There are tons of other accessories for the Quest 2 that we are hoping to get our hands on soon. Personally, I’m currently using the Quest 2 in almost stock form besides the charging dock. I do have the Oculus Link cable to connect to my PC to play games like the incredible Half-Life Alyx, though. But with Air Link, if you have good Wi-Fi, that isn’t necessary. I also have a new facial interface and foam replacement from VR Cover on the way.
9to5Toys’ Take
While not necessary for gameplay, adding a dock to your Quest 2 setup is a very handy way to keep the batteries charged and show off your headset. Personally, I prefer the smaller discrete Anker charging dock with the auto-connecting cable, but if you want to draw a little more attention to the setup, the NexiGo Quest 2 charging dock is a great option as well.
Buy NexiGo Quest 2 charging dock
FTC: We use income earning auto affiliate links. More.


Comments